Monday 6 December 2010

A Brief History of Crosfield & Fujifilm Drum Scanners

http://www.colourphil.co.uk/crosfield_scanner_intro.html

A Brief History of Crosfield & Fujifilm Drum Scanners 

A little information on the world's finest drum scanners.The Magnascan 530 & 540 range were launched way back in 1981. They were virtually completely digital. They were modular with separate Analyse and Expose scanner units. The Analyse scanner used a xenon lamp which had a colour temperature of approximately 6200K (similar to "daylight"). The separate expose scanner used a laser in conjunction with a modulator and "contact screens" to expose the final positive or negative film. They were largely replaced by the 640 range launched a year later. These used a laser to directly expose the output film using "EDG" (Electronic Dot Generation) technology, later known as "MagnaDot". These eventually became the 635, 645 and later the 636, 646, etc. ("6X6").
In the early 90's various attempts were made to link Crosfield scanners to DTP systems. The best of these was the Magnalink 600, which linked the Analyse scanner only to a Mac computer. Earlier versions of Magnalink had used a Sun Sparc computer, and were often combined with "MagnaRip" to  output film from Postscript pages.
These scanners were developed into the "Celsis" (Crosfield Electronics Ltd. Scanning Input System) range in 1994. The 5250 and 6250 models could not only input images into a Mac, but could be largely driven by the Mac. These scanners use sophisticated proprietary software (not a Photoshop plugin). At the same time an upgrade (Magnascans were always very "upgradeable") was launched for older models. This did not include the automated aperture turret and automatic or "memory" focus and enhanced resolutions. It was however extremely worthwhile. It allowed batch scanning, while simultaneously editing "prescan" images. All colour edits could be done on the Mac, and unlimited Setup files (CVs) could be saved.  Crosfield or Fuji Celsis 5250 or 6250 CASC Drum Scanner
A few years later the CASC upgrade to the Celsis 5250 & 6250 was launched. This gave automatic (rather than "memory") focus. It removed many of the scanner's dedicated circuit boards, replacing them with software on the Mac.  Early models had a dedicated "CRAB" colour processing board installed in the Mac, which was removed when Macs became faster (which in those days meant about 130mhz!). 
Crosfield also had an OEM arrangement with Howtek to sell their small desktop drum scanners, which were badged as "Celsis 240". Although quite good in RGB mode, they used no Crosfield software or technology. The CMYK software was of no comparison to the genuine Celsis software. Why Crosfield did not develop it's own small drum scanner is a complete mystery! The general consensus is that the company had lost it's way by then, mainly due to  incessant management changes. 
A Brief History of Crosfield Electronics Ltd.
John Crosfield formed Crosfield Electronics in 1947 to design and manufacture press control equipment. The first colour scanner, the Scanatron, which used CRT technology, was introduced in 1958. This took up nearly a whole room! The first of many Magnascan drum scanners, the 450, was launched in 1969.
Crosfield introduced the world's first digital scanner in the mid-70's. This was soon followed by Electronic Page Composition Systems capable of combining several images together. These later handled image retouching.  Very basic stuff by today's standards but revolutionary in the late seventies and early eighties. Crosfield Electronics Ltd. became part of the  large and very long-established De La Rue plc group in 1974. For many years the company was located in Holloway Road, North London. Manufacturing was relocated to Peterborough in the mid-70s. The Head Office and Research & Development department moved to Hemel Hempstead, Hertfordshire in 1984,  while the Training Dept. moved to nearby Watford.
In 1997 what remained of Crosfield became FFEI (FujiFilm Electronic Imaging), having for the previous few years been jointly owned by Dupont and Fujifilm.  Manufacture of drum scanners ceased around 2003. In the last few years only a handful were built. In the heydays of the 1980s as many as 100 per month could be built in the Peterborough factory. About 85-90% were exported. Indeed the company won so many "Queen's Awards for Export", etc. that the reception area couldn't display them all!  The Head Office in Hemel was scaled back to the former R&D building, with the former four floor office block being let to other businesses, and becoming "Catherines House". Manufacturing of platesetters, etc. remained in Peterborough, which was very fortunate, as later events were to prove.
On December 11, 2005 disaster struck in Hemel Hempstead. The adjacent massive Buncefield Oil Depot exploded. This was the largest explosion in Europe in peace-time! The very large Industrial Estate was almost obliterated. More than 40 premises were destroyed or seriously damaged. Fortunately it occured at 6 o'clock on a Sunday morning, so there were no fatalities and few injuries. The former Crosfield building was badly damaged, with the FFEI Head Office being completely destroyed. Apparently this was one of the nearest buildings to the oil tanks. Staff were relocated to Peterborough and to other temporary premises. Later in 2006 FFEI Ltd. had a management buyout from Fujifilm. Some of the best information and photos of the Buncefield disaster. 

Coast Imaging Arts - The Art of Imaging Excellence

http://www.coastimagingarts.com/

Hasselblad Flextight X1 - Test report and comparison to X5

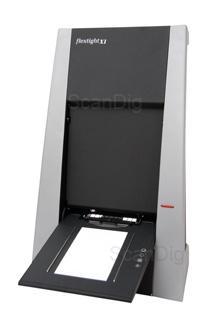
http://www.filmscanner.info/en/HasselbladFlextightX1.html


Within its product range, Hasselblad offers two professional film scanners. Hasselblad Flextight X1 is a slightly reduced version of Hasselblads top-model Flextight X5, for which we already certified an outstanding performance in our detailed test report. On this page, we will get into the differences between these two top-scanners and perform some tests in order to see how the Flextight X1 performs against the Flextight X5.
In our test labour, we have positioned both devices beside each other and operated them with two different computers in order to determine some further differences. In this short test, we will exclusively get into the differences between these two scanners so that a possible purchase decision results to be easier. Concerning the basic information about the equipment, installation and the handling of both scanners, we kindly ask you to read it from our detailed 
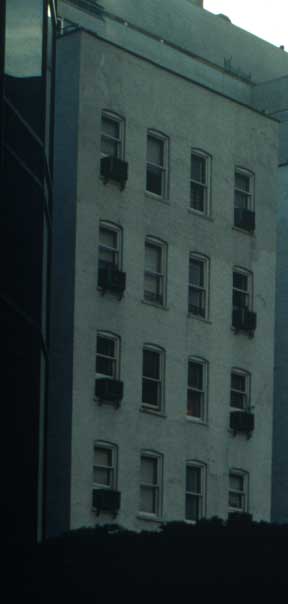
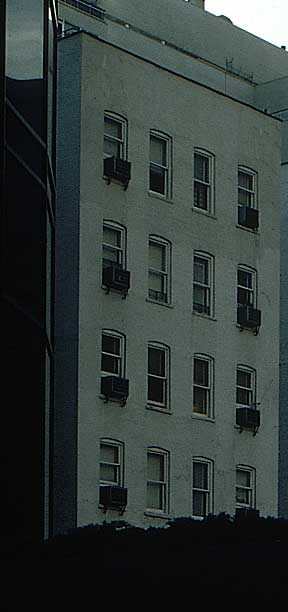
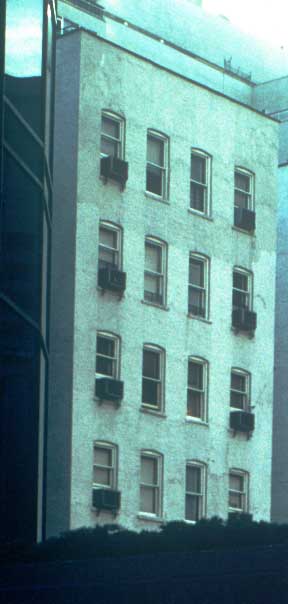
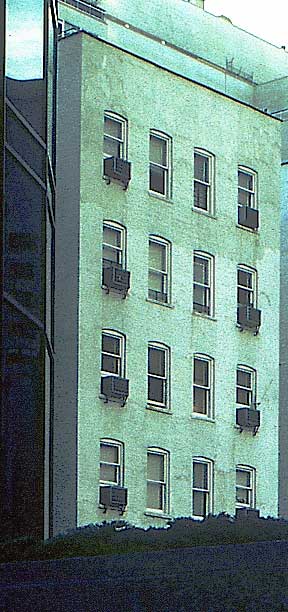
Test report of Hasselblad Flextight X5.Both scanners have a very similar exterior appearance. Except the model description which is located at the front side of the devices, they only differ by a small detail in the case: While the X5 has a ribbing at the case flanks, the case of the X1 is completely smooth. Both devices are of the same size. Thus, the differences must be in the interior.

Differences between Flextight X1 and Flextight X5

Hasselblad Flextight X1
In what does the Flextight X1 exactly differ from its big brother Flextight X5? Herein, we first would like to provide you with a general view. Thereby, we will observe 8 distinctive features of quality of both scanners; for now, we will discard the exterior differences of the cases as also the significant difference of the purchase price.

1. Resolution

First, there is the higher nominal maximal resolution of the Flextight X5 to be mentioned: Its 8000ppi are compared against the 6300ppi of the Flextight X1. But in practice, this difference becomes quite insignificant.
The respective maximum resolution of both scanners is only available in the 35-mm image format, and the Flextight X5 "only" achieves an effective value of about 6900 ppi in a scan resolution of 8000ppi. Thus, the difference in the effective resolution that is possible to achieve between the X5 and the X1 is of 6900ppi against 6150ppi. Both of these values are so extremely high that they exceed the resolution limit (grain boundary) of a 35-mm film.
Thus, the difference in the resolution is rather nominal, as in case of the medium and the large formats, there is no difference in the resolution of both devices. Therewith, the resolution criteria can be omitted as a real differential factor and should not have any influence in the purchase decision.

2. Maximum density, range of density

Both of the scanner models have a different maximum density: While the Flextight is still able to capture the film details of a maximum density of D=4,9, the maximum density of the X1 is of D=4,6. Therewith, the range of density of the X5 is approximately one aperture stop higher than the one of the Flextight X1.
The higher maximum density of the Hasselblad Flextight X5 means that in extremely dark image areas, the differences of brightness can be still captured while other scanners only represent the colour black. But herein, there is to mention in advance that during our tests, we could not determine in the case of any slide any differences in the dark areas of the scans done with the Flextight X1 and the ones done with the Flextight X5. Therewith, the density criterion also does not seem to be really decisive for the purchase in the comparison between both devices, but of course it is in comparison to other scanners.

3. Scan speed

According to the data sheets of the film scanners of Hasselblad, there is a huge difference in the scan speed between both devices: While the Flextight X1 provides a speed of 60 MB / minute, the Flextight X5 offers a speed that is 5 times faster which is 300 MB / minute.
This speed difference is clearly noticeable in practice, as recorded during our speed measurements. But in a straight comparison of both scanners, the factor value of 5 is not achieved but, depending on the image format, a value of about 4. This is due to the reason that during our measurements, beside the mere scanning times, the time of the film feeding is also included; in both scanners, these times are the same.
Thus, both Hasselblad scanners differ significantly in the scan speed. This is a significant and decisive distinction feature for the purchase. Those who want to scan large amounts will need a Flextight X5 in order to achieve a high productivity and capacity. But those who only occasionally need a high quality scan will also wait some minutes more until the image file is ready.

4. Compatible film formats, film adapter

Both scanners of Hasselblad practically do not differ from the exterior so that one could assume that both scanners can process the same film formats. The Flextight X1 can basically process all film formats that can be also processed by the X5, thus 35-mm films, medium formats 120/220, roll films and large formats up to 4x5". For both devices, the film adapter is identical.
But additionally, with the Hasselblad Flextight X1 it is also possible to scan large formats of 13x18cm (5x7"). This is not possible with the Flextight X5 - the light condensator that is built in it impedes the scanning of such a large film format. Therewith, the Flextight X1 does offer a decisive advantage against its big brother, specially because the large format of 13x18 cm is widely used.

5. Scans of non-transparent material

The scans of non-transparent materials can be digitalised with the Hasselblad Flextight X5 up to a format of DIN A4 (21 x 29,7 cm). This function is not available in the case of the Flextight X1, as this model only scans transparent materials. But it is easy to abstain from this feature, as on one hand, the scanning of non-transparent images/documents with the Flextight X5 is quite laborious and on the other hand, the achievable scan quality is not better than the one that results by using a high quality flat bed scanner that only costs a fraction of that what a Hasselblad Flextight costs.

6. Accessoires for the batch processing

For the Flextight X5, Hasselblad offers two feeders for the batch processing: a slide feeder for up to 50 framed 35-mm slides and a batch feeder for up to 10 film adapters of any type. With the first one, it is possible to scan up to 50 framed 35-mm slides in the automatic modus without any intervention of the user. In the latter, it is possible to insert up to 10 different film adapters so that the Flextight X5 processes up to 10 film patterns in the automatic modus. Thereby, it is not necessary that the 10 film adapters are of the same type but different formats can be mixed together.
With the Flextight X1, the use of such feeders is not possible; this device does not have any connection for these kind of accessoires. Thus, those who have large amounts of film material to process should not only choose the bigger Flextight X5 just because of the higher scan speed but also due to its expandability of the feeders.

7. Cooling of the sensor

Either the structure of the Flextight X5 as also the one of the X1 have some heat reducing features, as for example the externally arranged power supply and the appliance of a cold-cathode fluorescent tube as a light source. Moreover, the X5 additionally offers an active sensor cooling that continues reducing the image noise caused by the heat. But this is not significant until the device has been continuously used for several hours without any break in between the scanning procedures, thus specially if the optional batch feeding procedures are used, or if one works with several film adapters so that the scanner is continuously working.
The missing sensor cooling does not have a negative effect in the case of the Flextight X1, as this device does normally not work continuously. But in the case of the Flextight X5, the sensor cooling is absolutely necessary, as the device is specially made to perform a high capacity, thus for the permanent processing.

8. Light source

Compared to the Flextight X1, the Flextight X5 has a fixed installed light condensator located straight in front of the light source that disperses the light and therewith provides a soft illumination. Thereby, the smallest scratches and dust particles are outshined, a thing that eases a little the scan preparation concerning the cleaning of the film material and the post-processing concerning the photo retouching. For the scanning with the Flextight X1, the previous and thorough cleaning of the film material before the scanning is much more important as it is in the case of the Flextight X5, as every dust particle on the film is visible.
A straight comparison of the image results of both scanners gives a further insight of the effects of the harder light: The Flextight X1 makes the film grain clearly outstand. Depending on the texture of the grain, a more or less visible snow grain appears. Due to the hard light of the X1, the eventual deficiencies of the original material are mercelessly brought to light, a thing that is not necessarily a drawback. Such a high-definition reproduction can be absolutely wished. The raw scans of the X5 appear to be a little softer than those of the X1, and partly also a little less sharp.
Thus, the Flextight X1 provides some luscious, sharp scans, while the Flextight X5 provides some softer and slightly less sharp images. Which variant is the best is rather a question of taste than an objective criterion of quality. In the following, we will observe the image quality as also the scan speed of the Flextight X1, also in comparison to its bigger brother Flextight X5.

The image quality of the Hasselblad Flextight X1

In our Test report of the Flextight X5 we have shown that the top-model of Hasselblad, the Flextight X5, provides an excellent image quality. Further above on this page, we have listed the differences between this device and the Flextight X1 tested here. Some also have an effect on the image quality. In the following, we will examine this.
A resolution test of the Hasselblad Flextight X1 results in an effective resolution of 6150 dpi.
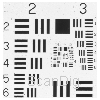
Let us start, as usual, with the resolution. As already mentioned, the X1 does not have the "HiRes" modus for 35-mm image scans with 8000ppi. 6300ppi as the highest resolution. In our resolution test with a USAF-1951 test chart, it is barely possible to distinguish the horizontal lines of the element 7.1 and the vertical lines of the element 6.6. Therefrom, the same effective resolution results for the Flextight X1 as the one of the X5, that is 6150 ppi.
In case of larger image formats, the maximum resolution values do not change: For the medium formats 120/220, there are 3200ppi available, and the large format 4x5" can be digitalised with maximum 2040ppi. The measured effective resolutions correspond to the ones of the X5. Thus, with some effective 6900 dpi, the Flextight X5 can achieve, compared to the 6150 dpi of the Flextight X1, a resolution that is 10% higher in the field of the 35-mm images; but this difference has no effect in the practice, as in the case of such a high resolution, the grain boundary of a film is exceeded long ago. The resulting conclusion of this is that concerning the resolution, the small Flextight X1 is equal to the large Flextight X5.
The Hasselblad Flextight X1 has a maximum density of 4,6, while the bigger brother achieves a value of Dmax = 4,9. But despite of the slightly low maximum density, the Flextight X1 provides the same good results as its bigger brother. The lights and the shadows also provide enough definition even in case of an extremely high image contrast. The difference of 0,3 in the maximum density did not have any effect in our tests. Only the tonal value curve from some very dark images of the Flextight X5, in the very left area, one recognizes some more deflections than in the ones of the Flextight X1. But in practice, the difference is not noticeable. Therewith, we can assume that concerning the range of density, both of these scanners are equal and also on a high level of quality.
In case of the X1, the grain structure and the dust are more visible than in the case of the X5.
What is interesting is the difference in the image effect of both scanners that results from the different quality of the light source: The light of the X5 that is soft due to the firmly installed light condensator makes the film grain to appear less dominant as also makes the smallest scratches and dust particles disappear.
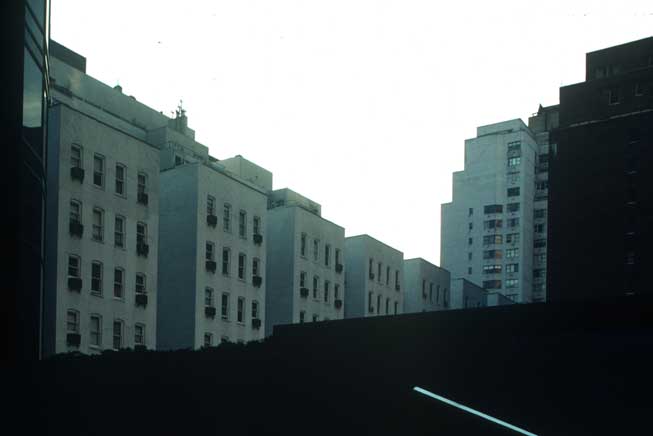
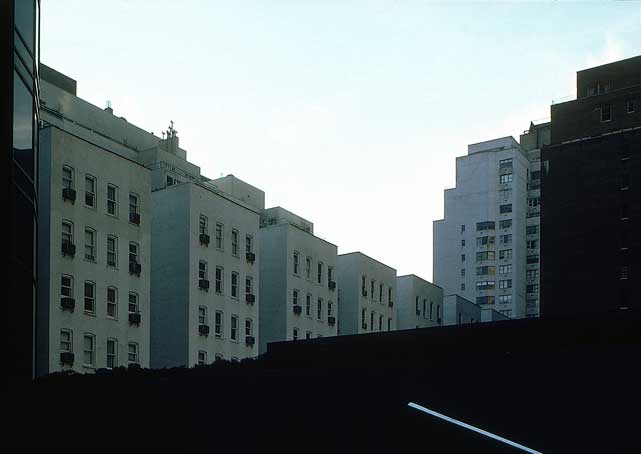
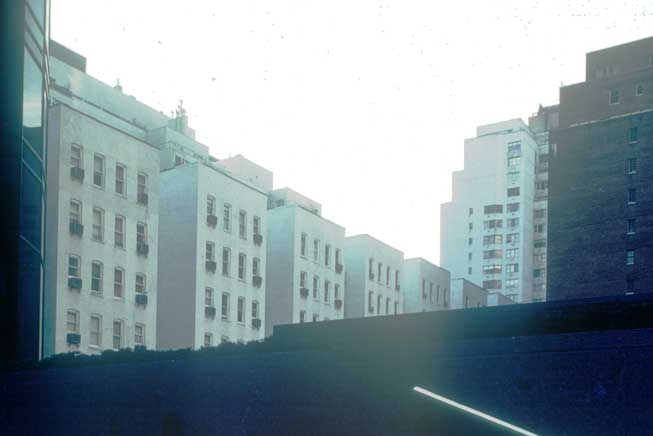
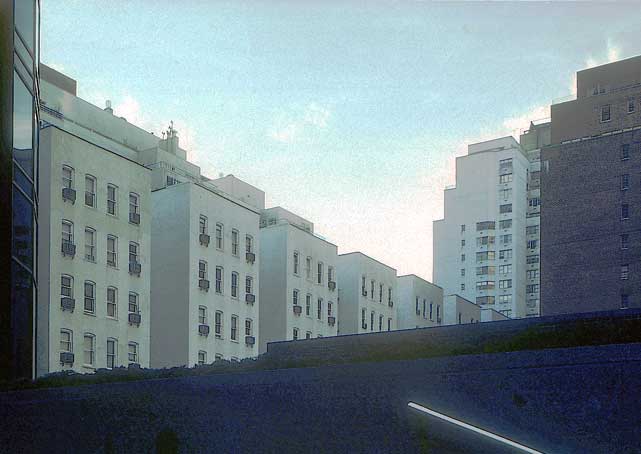
This can be seen very well in our first comparison image that enlarges as soon as you click on the thumbnail shown here. Thereby, the image switches approximately any three seconds between the scan done with the Flextight X1 and the one done with the Flextight X5. The image is a 100% outcut of a medium format that was either scanned with the Flextight X1 as also with the Flextight X5. The dust particles of the test slide are clearly more visible in the scan done with the X1, and the film grain is also more strongly marked.
The scans done with the Flextight X1 appear sharper and more luscious than the ones made with the X5.
Here, the light condensator is missing in the X1 that provides a very hard and focussed light, the way we know it from the LED light sources, so that every imperfection on the original film, no matter how small they are, are shown: Depending on its texture, it appears more or less visible but always in a high definition and even the smallest scratches, dirt and dust particles are mercessly scanned.
Due to this difference, the scans done with the Flextight X1 appear always slightly sharper than the ones made with the X5. As an example for this, please look at the second image sample which is also a 100% outcut of a scan that is also done with both scanners. But in any case, it should not be understood that the scans of the X5 are not sharp. The X1 only provides a little bit more of sharpness. If this shlight blur effect of the X5 is to be considered as an advantage or a disadvantage depends on the desired final result.
But again, in the noise behaviour of the X1 that in theory should differ from the one of the X5 due to the missing active sensor cooling, we could not determine any difference between both scanners. Also during the test scan of 15 slides of the medium format 6x6 that had been accomplished in immediate succession, in the case of the X1, no image noise was caused as a result of the heat. We assume that the cooling system of the Flextight X5 does not unfold its effect until it is used in continuous operation during the whole day with a feeder.
It can be generally said that the Hasselblad Flextight X1 provides an excellent image quality which can compete without any problem in practice with the top model Flextight X5. Both scanners only differ in the image impression: While the X5 represents the details in a pleasant, slightly soft way, the X1 also toughly represents the finest structures as the film grain and the dirt.

The scan speed of the Hasselblad Flextight X1

Hasselblad announces the scann speed of the Flextight X1 with a value of 60 MB / minute. Compared to the Flextight X5 which has a speed value of 300 MB/minute, the Flextight X1 is therewith clearly slowlier. This huge difference in the speed can be also easily measured in practice. The actual scanning times can be taken from the following table:
ProcedureDuration
Transparency scan of a 35-mm image with a resolution of 2000ppi1:00 min
Transparency scan of a 35-mm image with a resolution of 5000ppi3:47 min
Transparency scan of a 35-mm image with a resolution of 6300ppi6:29 min
Transparency scan of a medium format 6x6 with a resolution of 1600ppi1:33 min
Transparency scan of a medium format 6x6 with a resolution of 3200ppi5:14 min
Transparency scan of a large format 4x5" with a resolution of 1020ppi1:27 min
Transparency scan of a large format 4x5" with a resolution of 2040ppi4:38 min
The scanning times where detected with the same computer that we also used for the speed test of the Flextight X5: a Windows 7 64-Bit computer with an Intel Core i7 processor and 8GB RAM. With this hardware, which was a high quality hardware at the time the test had been performed, it was possible to make use of the full speed capacity of the scanner and not to thwart it due to a data processing that is eventually much too slow.
By comparing the values of the Flextight X1 and X5, the resulting speed factor is of about nominal 4; nominally, Hasselblad announces a difference value of the factor 5. The resulting factor reduced by 1 is due to the reason that in our measurements, we consider the total time of the scanning including the transporting time of the film that is equal in both devices.

Purchase decision Hasselblad Flextight X1 or X5

Both film scanners, either the Flextight X1 and Flextight X5 are absolute top-devices which really deserve the name High-End-Scanner. In our Film scanners ranking list they deservedely occupy the first and the second place. Both devices convince with an absolute top-quality of image, a high processing quality and a high flexibility concerning the scanneable material. Those who decide to purchase a Hasselblad scanner will be rewarded with an excellent image quality that cannot be achieved by any other scanner. There are currently no better film scanners than these two devices of Hasselblad on the market.
The question that still remains is which of these two models of Flextight is the right one for one. Concerning the image quality, both devices only differ insignificantly from each other. While the Flextight X1 provides some scans which are a little more sharp and luscious, the image results from the Flextight X5 are softer and with less dust particles and scratches. The choice between these two devices is purely a matter of taste. In case of the Flextight X1, the film cleaning previous to the scanning is of a more important role than in case of the Flextight X5. For cleaning the film material, the use of an Anti Dust Spray as also some special Film Cleaning Devices is recommendable.
A decisive criterion of choice for the Flextight X1 is the possibility that it offers to scan large formats of 13x18 cm (5x7". In case of Flextight X5, the normal size of 4x5" possible.
But the decisive purchase criterion for a Flextight X1 or a X5 is the speed: The Flextight X5 is absolutely designed for the fast processing of large image quantities. The scan speed of the Flextight X5 is higher as the one of the Flextight X1 by a factor of 4. In case of the Flextight X5, the active cooling avoids the noise effects caused by the increase of heat, even in the case the device is continuously used throughout the day. And due to the expandability of the optional feeders, it is even possible to work in a real batch processing with the Flextight X5.
Last but not least, the purchase price is also a decisive purchase criterion: The Hasselblad Flextight X5 costs about 7000 € more than its little brother. Therewith, the purchase criterion can be shortly resumed: Those who occasionally need an extremely high-quality scan will be perfectly served with the Hasselblad Flextight X1. But those who need a large quantity of films to be digitalised on a daily basis should get the fast X5.

Conclusion

The Hasselblad Flextight X1 is a scanner that provides an extremely high image quality that is located at the level of the top-model of the Flextight-series, the X5. While the Flextight X5 provides a soft focus effect due to the permanently installed light capacitor which reduces the film grain and dust particles, the Flextight X1 provides the highest possible sharpness of details that makes them clearly outstand. What is preferrable depends on the personal preferences and/or the desired results.
Thus, the Flextight X1 is recommendable for all those users who need the highest possible image quality but for which a high capacity is not a criterion. Those who want to scan some film material of the large size of 13x18cm can anyway only choose the Flextight X1.

Nikon LS-2000 and EverSmart Benchmarks

http://www.marginalsoftware.com/Benchmarks/ls2000andES.htm


The following images were scanned on a Nikon LS-2000 and a Scitex EverSmart Supreme as possible benchmarks.  Since both have more than adequate resolution, the intention was to display the effects of noise, D-max, and flare.   These images were  among the few that were exceptionally difficult for the LS-2000 to scan.
Original images shot on Kodachrome 64.  Images adjusted for contrast and color balance only.  Some spotting was done to remove dust.  Building images shown without sharpening.


Nikon LS-2000 (downsampled from 1500 dpi)

16x sampling effectively suppresses noise.


EverSmart (downsampled from 1500 dpi)


Below.  LS-2000 scan tonally adjusted to enhance flare


Below.  EverSmart scan tonally adjusted to enhance flare


Below.  Detail at original resolution
LS-2000EverSmart


Below.  Tonally enhanced to display effects of flare.
LS-2000Eversmart


Below.  Scanned on the LS-2000 60% USM applied.


Below.  Scanned on the EverSmart.  60% USM applied.  


A Comparison of CCD and Drum Scanners for Novices

http://www.marginalsoftware.com/Scanner/Scanner_Intro.htm


A Comparison of CCD and Drum Scanners for Novices


Photography has been a hobby of mine for over two decades. Along with a professional involvement with computers, it was only natural that this hardware freak would eventually buy a scanner, the first of which was a Nikon Coolscan I.  In the days before the Web and devices that could competently display the Coolscan's output, it was little used other than for recording my photography and for personal enjoyment.  The Web and the Epson Stylus printer changed all that.  Scanners, PCs, digital cameras, and snapshot capable color printers are now offered as mass-market items.  A visit to the imaging department of a magazine publisher in New York reflects how radical changes in the mass-market can eventually drive technological developments in the high-end: off-the-shelf Macs and software have replaced specialized graphics workstations; Epson printers are being evaluated as replacements for expensive dye-sublimation printers; and networks enable rapid and widespread access of editorial material.  When it comes to scanners for publishing, however, drum scanners are still the technology of choice.
If, like me, your involvement with digital scanning is as an avocation rather than as a vocation, you may have heard or read that drum scanners provide the ultimate in scanner performance. The most common technology employed in consumer scanners is the charge-coupled device (CCD). Few people, however, have had the opportunity to compare directly CCD and drum scanner output side-by-side. After a couple of friends asked me about the difference in results between the two technologies, I decided to put pictures scanned by these types of machines on the Web, kind of as a public service. My point is to demonstrate to users of consumer-grade scanners that the major area of potential improvement for generating quality scans lies in increasing density range


Scanners Used
As a representative CCD scanner I chose a Nikon LS-2000. The drum scans were performed on a Linotype-Hell ChromaGraph S3900. Why did I choose these devices? Mostly by default: an LS-2000 sits on my desk at home; the company where a friend of mine works has a variety of flatbed and drum scanners, but since they have a battery of S3900s, it's easier to get access to one of them.

Scanner SettingsThe Web imposes severe constraints on any author attempting to implement a scanner comparison page. First, when we're speaking of high-end scanner output we're talking big-time files and transmission times. To make retrieval time more tolerable, I've down-sampled and cropped from the full-frame images as much as possible without compromising the comparability of the scans. I've included links to higher resolution picture details for closer comparison.  Second, the Web is a mass medium, accessible to users with a wide variety of devices. Most PC monitors are not very capable when it comes to displaying photographic images. Unfortunately there's not much I can do if your video card/monitor cannot display these images. The LS-2000 scans were performed at 8bits/channel and 1200 dpi, well within the limits of its capabilities of 12bits/channel and 2700 dpi. The S3900 scans were performed at 8bits/channel and 1200 dpi, also well within its capabilities.

Comparing the ImagesI've included 2 sample images for comparison of CCD and drum scanned images. These images were chosen as a test of the LS-2000's D-Max, one of the highest for CCD scanners.  Other than D-Max, these scans are not representative of the ultimate capabilities of either the LS-2000 or S3900 in particular--the image files required for this would be huge--but of CCD and drum scans in general.  Technically speaking, I'm showing how images compare when D-Max is the independent variable.  Before clicking to display either image make sure your video card/monitor is set to at least 24-bit color.
For each image, compare the CCD and drum scanner images at 1200 dpi to verify that the drum scanner is better at imaging shadow detail at equivalent resolutions.  Next, display the same CCD scanner image  detail at 2700 dpi.  There is a slight improvement in quality over the 1200 dpi image, but it is still not nearly definitive as the drum scanned image.  This demonstrates that doubling resolution fails to improve quality sufficiently to compensate for the drum scanner's higher D-Max at 1200 dpi.

    Midtown
    Downtown

DiscussionTake my word on this, the two drum scanned images closely approximate the slides when viewed on a light table. They would have been dead on if more of the S3900's bit depth and resolution had been used. You might also notice that even at 1200 dpi the S3900 starts to resolve film grain, because of its very high density range and absence of noise.
By the way, did the drum-scanned images look dull and muddy? It's possible your monitor, even though the video card is set to 24-bit color, can't hack showing high quality images created by a drum scanner. That's no insult; it only highlights the essential problem of using drum-scanned images: few consumer level devices can handle the long tonal ranges producible by drum scanners.
Although the drum scanner images contain more shadow detail, that doesn't necessarily make them esthetically more pleasing or more effective at expressing the photographer's vision.  Remember the Christmas pictures of the family sitting on Aunt Emma's sofa? Is it really necessary that the sofa's plaid pattern show up in your prints?  And if you scan for increased resolution, will your final output device be able to make effective use of it? 

The Drum Scanner OptionWhere critical scanning and volume are an intrinsic part of business operations--in publishing, engraving, and fine arts--it makes sense to own a drum scanner. For the majority of us who dabble in imaging, a competent CCD desktop scanner will fulfill the vast majority of needs.  Personally, I would use a drum scanner for badly exposed shots, larger format film, posters, and archiving of fine art. For these exceptions, it's sufficient to have recourse to a service bureau that performs drum scanning.

SummaryThe drum scan images, when compared in detail with CCD images, show how good scanner technology could be if more emphasis were to be on improving D-Max.  In addition, it makes little sense to do this in isolation without improving monitors and printers in parallel (as you possibly may have seen when you tried to display the pictures).  Hopefully this effort will modestly change the way consumers evaluate scanners and ultimately drive the design process of scanners.
AcknowledgementsI would like to thank Janet Miller of Time Inc. and Brad Pallas of Hachette-Filipacchi Magazines, Inc. for their assistance.  Austin Franklin of darkroom.com and Phil Lippincott of AZTEK, Inc. graciously contributed by explaining the distinctions between "density range" and "dynamic range".

Sunday 5 December 2010

DRUM SCANNING RESOLUTION

http://www.dannyburk.com/drum_scan_resolution.htm


Drum scan resolution is unsurpassed for sharpness and contrast range. Seeing is believing!
Here are some actual UNRETOUCHED drum scan clips. Note that they have not been altered in exposure,
saturation, sharpening, or sizing: they are clips that I've taken directly from an actual drum scanned 4x5
transparency (Velvia 100F). Below the clips is a large (1200 pixels in height) illustration of the entire 4x5,
with the red box indicating the area seen in the 2000 dpi clip.
Like any scanned or digital image, a raw drum scan will always appear soft, requiring proper sharpening for
the final result. Remember that these clips are UNSHARPENED (the full-size image has been sharpened for
web viewing), but the minute detail that has been captured can easily be seen even in this unsharpened form.


The clip above is from an unretouched 2000 dpi scan. The original transparency is extremely sharp and
detailed; note that individual leaves and blades of grass are clearly visible in the scan, even though these
trees were about 1/3 mile from my camera position. (A 450mm lens was used in 4x5 format.)  If your monitor
is set at a resolution of 1024x768, you are viewing this clip as it would appear in a print of about 8x10 FEET
in size!


Even higher resolution. This clip is an unretouched sample at 4000 dpi. At this resolution, the clip is comparable
to what you would see in a print of about 16 x 21 FEET in size...and remember that it hasn't been sharpened for printing.


Frost-covered trees, Lake of the Clouds, Porcupine Mountains State Park, Michigan


Here is the full image, sized to 1200 pixels along the long side. It has been sharpened for web viewing.
The red box encloses the area shown above in the 2000 dpi clip. With this scan, I can create large,
incredibly detailed prints: my 4000 dpi scan will print at about 45 x 56 inches  (at 360 dpi) with no
interpolation.  (Side note: be aware that the trees in the above image are coated in thick frost,
which accounts for their pastel appearance; the image is not washed out!
© Danny Burk Photography, LLC


Scanner Comparison - Epson vs Imacon vs Howtek

http://www.timparkin.co.uk/blog/scannercomparison

Scanner Comparison - Epson vs Imacon vs Howtek


I've posted previously about a comparison between drum scanners and Epson flatbeds. The fact that the drum scanner trounced the Epson was not really in contention but recently I had the opportunity to get a scan from a modern Imacon scanner (owned by Joe Cornish) and from a Howtek 4000 drum scanner (re-badged Crosfield Magnascan 200i I believe, and owned by Dav Thomas) using Silverfast Ai v 6.6 & Kami SXL 2001 fluid both using the same transparency that I had previously had problems with using my Epson.
I knew that the drum scanner was going to provide a better resolution scan than the Imacon but I was more interested in how well it scanned shadows and was it immune to some of the artefacts that I'd seen from the Imacon and the Epson. These artefacts were halation and chromatic abberation.
Halation, a glow around high brightness areas that impinges into darker areas. I have seen a small version of this, a few pixels on a 2000dpi scan, and also a larger version that spreads 2-300 pixels. In photographic terms this is similar to flare and I imagine it occurs in a similar fashion. In the example scan you can see this in the area around the cliff edge and also at the top of the worms head island.
Interactive Example of Halation
Chromatic abberation is evinced as a red and blue borders at opposite sides of a high contrast edge. In the scan you can see this the worst around the white lichen hot spots at the bottom left of the picture but it can also be seen at the top right of the cliff top and also as a strange colouring in the sea where you have a highlight off the wave top right next to a shadow from that same wave. The image at the top of this post shows one of an example of this.
Interactive example of Chromatic Abberation
In comparing these results, it should be kept in mind that the drum scan took 5 mins of mounting and 1.5 hours of scanning wheras the Imacon took 5 minutes to do both.
Here is one of the clearer examples which shows what happens if you want to pull detail out of shadow areas..
Interactive Example of pulling shadow detail - look closeley at the twig bottom left
Click on the many links on the left hand side of the Interactive Example to see more crops.
In conclusion it seems that the best way to scan images is to get a drum scanner. However, there are many other factors at play here. Wet scanning is messy and a lot of people are uncomfortable exposing transparencies in this way. Also, the whole process is a lot more time consuming. Finally, the amount of room a drum scanner takes up can be 10x as much as an Imacon. Realistically, if you want to scan more than a couple of photos a month and you have the budget, an Imacon will always be a better choice. However, for those with limited budgets, excess time and who only process a few images a month, a drum scanner will produce stunning results.

If most flatbed scanner ads try to compare their scanners with the quality of a drum scanner, don't you wonder why a drum scanner is so much better?

http://www.flatbed-scanner-review.org/flatbed_scanner_drum_scanner_li/drum_scanner_quality.html


If most flatbed scanner ads try to compare their scanners with the quality of a drum scanner, don't you wonder why a drum scanner is so much better?

Clearly a scan from a drum scanner is superior in almost all respects. This should be qualified relative to entry-level drum scanners which use CCD sensors. Several companies have repackaged flatbed scanners to resemble drum scanners in physical shape and appearance or in their specs as touted in PR.
ICG Global Graphicsdrumscan
Ian Smith, at that time of ICG as Global Graphics, now handled by DCS Associates and ColourPeople. Ian is seen here many years ago either at DRUPA 2000 or Photokina of that year. He has been with the ICG scanner all these years. This continuity means you are assured of knowledgable tech support today in 2004.
To make matters worse, some of these camouflaged flatbed scanners were overpriced to make them resemble drum scanners all the more.
In summary, if you want the absolutely best scanner, then your best decision is a full-scaled drum scanner. The former Crosfield scanners now manufactured by Fuji would be one good choice for an industrial strength drum scanner. Heidelberg makes a top of the line drum scanner.
My personal choice in drum scanners would be the drum scanner models from ICG shown at left because I dislike the idea of having to put oil on my transparencies. The FLAAR Photo Archive chromes are relatively fresh, most have never been used (or abused), and hence do not have enough scratches to warrant oiling to reduce such scratches. The ICG drum scanners offer a slot system so you can insert the transparency without any liquid. I also dislike the need of cleaning up the poor transparency after this whole process (in part because I have 40,000 transparencies that would need to be oiled, and then cleaned). ICG makes a system whereby you can do a drum scan without oil. Nonetheless, you will actually get better results if you do use oil. Even on a flatbed if you oil the slides the resultant scan is better. This is why Creo offers an oil mounting station for their high-end flatbed scanners.
Dust is present on all slides and negatives, even those fresh from a darkroom (good old static electricity is to blame here). The drum scanner focuses just on the film plane and thus may miss the dust which is on or above the surface of the transparency. Also, when you clean the transparency and apply the oil, the dust and scratches disappear. It is faster to prepare and load a drum scanner (and not have to erase dust and scratches later in Photoshop) than it is to do a flatbed scan and then waste 30 minutes to an hour using a rubber stamp tool in Photoshop to cover over the blemishes.
Sure you can automatically remove dust and scratches with software, but that maneuver also removes some of the quality. Removing dust also takes time. In other words, a drum scanner may be more cost effective.
Whereas monumental specs are always impressive, it is the final results, what the image looks like to the viewer (and especially to the client) which count. In other words, 10,000 dpi may not be seriously necessary, but it is surely nice to have more than the 1200 dpi of mid-range flatbed scanners. Besides, there is no XYZ stitching with a drum scanner. You get the full dpi that you selected (usually 3000 dpi and up).
But again, beware of low-end drum scanners, of repackaged CCD scanners, and other claims of "drum scanner quality."
After all, the only scanner that can truly produce drum scanner quality is a quality drum scanner. Fuji and ICG are a good place to start. A drum scanner from Heidelberg should certainly be expected to be of professional quality. I do not have experience with Screen USA (Dainippon Screen) but they are a respected name in the prepress world. The only drum scanners that we are not overly enthusiastic about are those of Howtek. Nowadays a good flatbed scanner from Creo , such as a Creo EverSmart Pro II or especially the Creo EverSmart Supreme probably produces a better scan than a Howtek. If you want a drum scanner, might as well get a really good one, namely an ICG drum scanner. After all, if you want a "cheap scanner" you should not be reading these pages anyway. Cheap scanners produce cheap scans, which are probably okay for many users, but we prefer better quality.
If you need help deciding what high-end professional flatbed scanner to select, you cane-mail the main reviewer at FLAAR, Nicholas Hellmuth. Just be sure to specify roughly your needs (what do you scan, 35mm, medium format, 4x5), what is the end product of the scan (posters, calendars, printed, wide format, or whatever), and your realistic budget.
For us to answer you personally, however, please do not ask a question that is already covered in the pages of the web site. Please check out the Directory of all scanner pages, before you contact us.
We would provide a phone number, but the FLAAR crew is either in Germany or Guatemala or checking out digital imaging equipment at a trade show in the USA. You can write in German, Spanish, French, Italian, or naturally English. No, FLAAR does not sell scanners (this is a non-profit institute) but we can definitely suggest reliable sources.